If you’ve ever looked at your hard drive or SSD in Windows Disk Manager and seen a partition with the description “Healthy (Recovery Partition),” that’s your recovery partition. Windows or your computer manufacturer (or both) puts these partitions there so you can restore your system to its original state in case of emergency. However, if you already have a full backup image on an external drive, which is better, you might want to delete the recovery partition to save space.
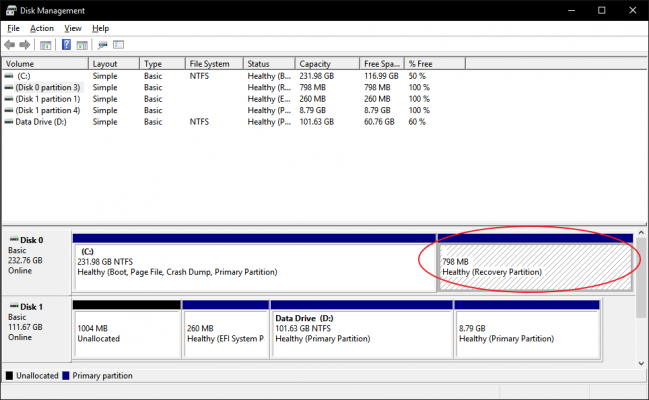
Unfortunately, Windows won’t let you delete the recovery partition in Disk Manager. When you try right clicking on it, Delete Volume isn’t an option as it is on other partitions. This limitation can be particularly annoying when you have a larger disk and you want to combine too partitions, but they are separated by a recovery partition. Whether you want to combine partitions or just save some space, here’s how to delete a recovery partition in Windows 10 (instructions also work for 7 or 8).
1. Type Cmd into the Windows search box. A list of results appears.

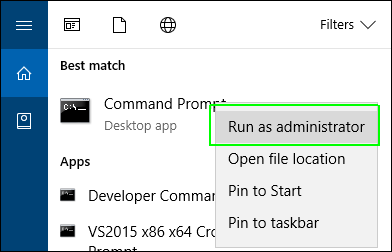
2. Right click on Command Prompt and select “Run as Administrator.”
3. Type “diskpart” at the command prompt and hit Enter.

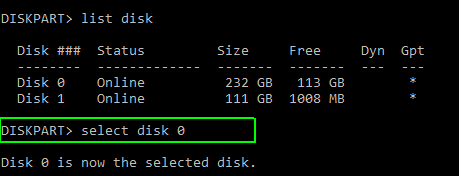
4. Type “list disk” and hit Enter. A list of physical drives appears. If you’re doing this on a laptop, you probably only have one drive.

5. Type “select disk” and the number of the disk. The first (or only) disk is number 0. Hit Enter.
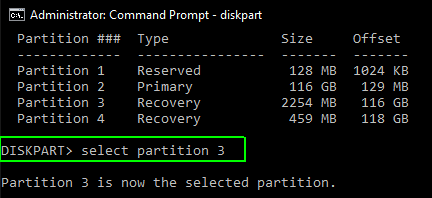
6. Type “list partition.” A list of partitions appears.
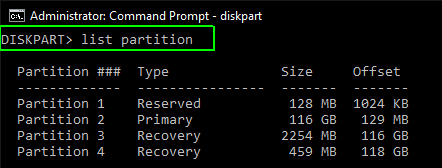
7. Type “selection partition” and the number of the recovery partition you wish to delete. There may be more than one.
8. Type “delete partition override.”

That will erase the partition. However, you should make sure you have a full system backup on an external drive so you can do a restore if you ever need to.
